






The Definitive Guide to a Forex EA Backtest: From Setup to Analysis

The Definitive Guide to a Forex EA Backtest: From Setup to Analysis
Every Forex trader has seen the promise of a ‘set and forget’ EA, only to watch it fail in live markets. The critical step they almost always miss? A rigorous, professional-grade forex ea backtest. Many traders, especially those with busy careers in IT, engineering, or finance, are drawn to the idea of automation to save time and remove emotion from trading. Yet, this rush for a hands-off solution often leads to costly oversights.
This isn’t another high-level overview. This is the practitioner’s guide to backtesting, designed to take you from raw data to actionable insights. We’ll teach you not just how to run a test, but how to think about the results like a quantitative analyst. We will walk you through configuring the MetaTrader Strategy Tester step-by-step, provide a masterclass on decoding the performance report, and reveal the common mistakes that lead to misleading results.
Before you can run a forex EA backtest, you need a robust Expert Advisor. If you’re still learning about them, our The Ultimate Guide to Forex Expert Advisors (EAs) is the perfect place to start.
What is an EA Backtest and Why is it Non-Negotiable?
An EA backtest is the process of simulating an Expert Advisor’s trading performance using historical price data. It allows you to see how your automated strategy would have hypothetically performed over past months or years, giving you vital clues about its potential strengths and weaknesses before you risk a single dollar of your real capital.
The reason this process is non-negotiable is simple: it is your primary tool for risk management and due diligence. It’s not just about discovering a winning system; it’s about efficiently and cheaply eliminating the vast majority of strategies that are destined to fail. Running an EA on a live account without a thorough backtest is like a pilot flying a new plane design without ever using a simulator. The results are unpredictable and potentially catastrophic for your trading account.
It’s also important to distinguish backtesting from forward testing. While a backtest uses past data, a forward test involves running the EA on a demo account in real-time market conditions. A successful backtest is the prerequisite for a forward test, which is the final step before going live.
Before you even open the Strategy Tester, run through this quick checklist to save yourself from common errors.
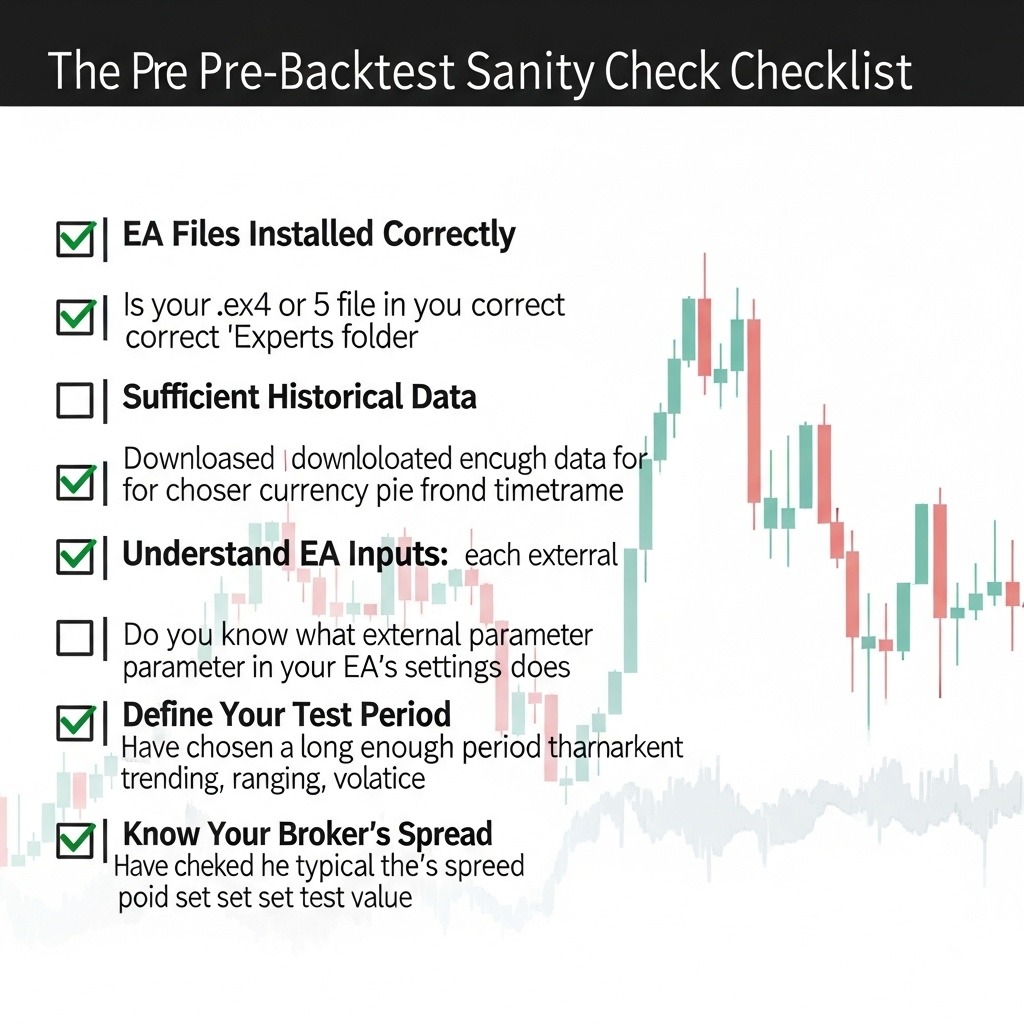
- [ ] EA Files Installed Correctly: Is your .ex4 or .ex5 file in the correct ‘Experts’ folder?
- [ ] Sufficient Historical Data: Have you downloaded enough data for your chosen currency pair and timeframe from your broker?
- [ ] Understand EA Inputs: Do you know what each external parameter in your EA’s settings does?
- [ ] Define Your Test Period: Have you chosen a long enough period that covers different market conditions (trending, ranging, volatile)?
- [ ] Know Your Broker’s Spread: Have you checked the typical spread for your pair to set a realistic test value?
How to Run an EA Backtest in MT4: The Complete Walkthrough
MetaTrader 4 (MT4) comes with a powerful, built-in tool called the Strategy Tester, which is where you will conduct your backtests. While MT5 has an updated version, the principles and process are very similar. To begin, open the Strategy Tester by navigating to “View” in the top menu and selecting “Strategy Tester,” or by using the shortcut Ctrl+R.
This will open a new panel at the bottom of your platform. This is your command center for testing. We will now break down each setting in the “Settings” tab, one by one, to ensure you configure your test for the most accurate results possible.
Configuring Your Test: Expert, Symbol, and Period
How do I set up the basic parameters of my test? The first step is to tell the Strategy Tester what you want to test, on which market, and over what timeframe. This foundational setup ensures the test is relevant to your specific automated strategy.
- Expert Advisor: This is a dropdown menu where you will select the EA file you wish to test. If you don’t see your EA, double-check that you have placed its file in the correct
MQL4/Expertsdirectory and restarted MetaTrader. - Symbol: Here, you choose the currency pair for the test, such as EURUSD or GBPJPY. It is crucial to use the exact symbol your broker provides, which may include a suffix (e.g.,
EURUSD.proorEURUSDm). Using the wrong symbol will result in an error. - Period: This setting determines the chart timeframe the EA will run on. It should match the timeframe the EA was designed for. A scalping EA might use M1 or M5, while a swing trading EA might use H1 or H4.
The “Model” Setting: The Single Most Important Choice for Accuracy
What’s the difference between “Every tick,” “Control points,” and “Open prices,” and which one should I use? Of all the settings, this one has the most significant impact on the quality and reliability of your backtest. Choosing the wrong model can produce wildly misleading results, giving you false confidence in a failing system.
- Open prices only: This is the fastest but least accurate method. The tester only considers the open, high, low, and close (OHLC) prices for each bar. It completely ignores price movements within the bar, making it useless for any EA that makes decisions based on intra-bar price action. Avoid this model.
- Control points: This is a more complex but still highly inaccurate method that generates a limited number of ticks within a bar based on a fractal interpolation algorithm. It’s a compromise that should also be avoided for serious testing.
- Every tick: This is the most accurate and resource-intensive method. For any serious forex EA test, this is the only acceptable model. It attempts to simulate every single tick movement between control points, providing the most realistic simulation of how an EA would have operated in real-time. While it takes longer to run, the accuracy it provides is non-negotiable.
Setting the Date, Spread, and Visual Mode
How do I define the test period and simulate real trading costs? To get a robust picture of an EA’s performance, you must test it over a significant period and account for the costs of trading. These settings allow you to control those variables.
- Use date: Check this box to specify the start and end dates for your test. Avoid testing over short periods like a few weeks. A minimum of one year is advisable, with two to five years being ideal to ensure the EA is tested across various market conditions (bullish, bearish, ranging).
- Visual mode: This feature opens a chart and lets you watch the EA place trades in real-time during the simulation. It is incredibly useful for debugging or understanding an EA’s logic, but it slows the test down dramatically. Use it for short-term analysis, but keep it turned off for long-term performance backtests.
- Spread: This setting is critical for realistic results. The “Current” option uses the live spread at the moment you run the test, which is not representative of the past. It’s best practice to set a fixed spread that is slightly higher than your broker’s typical average for that pair. For example, if the average spread on EURUSD is 0.8 pips, running the test at a spread of 1.5 or 2.0 acts as a stress test.
Expert Properties: Input Parameters
How do I change my EA’s settings for the test? Your EA’s strategy is controlled by its external parameters, and the “Expert properties” button is where you configure them for your backtest.
Clicking this button opens a new window, typically with an “Inputs” tab. Here you will see a list of all the configurable variables in the EA’s code, such as StopLoss, TakeProfit, LotSize, or indicator settings like MovingAveragePeriod. It is vital to understand what each of these parameters does. Running a test with default or misunderstood settings will not give you a meaningful evaluation of the EA’s potential. Adjust these values to match the strategy you intend to test.
Masterclass: How to Read & Analyze the Backtest Report
Once the Strategy Tester finishes, you will be presented with three new tabs: “Results,” “Graph,” and “Report.” While the equity curve on the “Graph” tab provides a nice visual, the real story of the EA’s performance is told in the “Report” tab. A beautiful upward-sloping curve can hide dangerous risk characteristics that are only revealed by digging into the numbers.
This infographic breaks down the key components of the MT4 report, turning a confusing list of numbers into an actionable analysis tool.
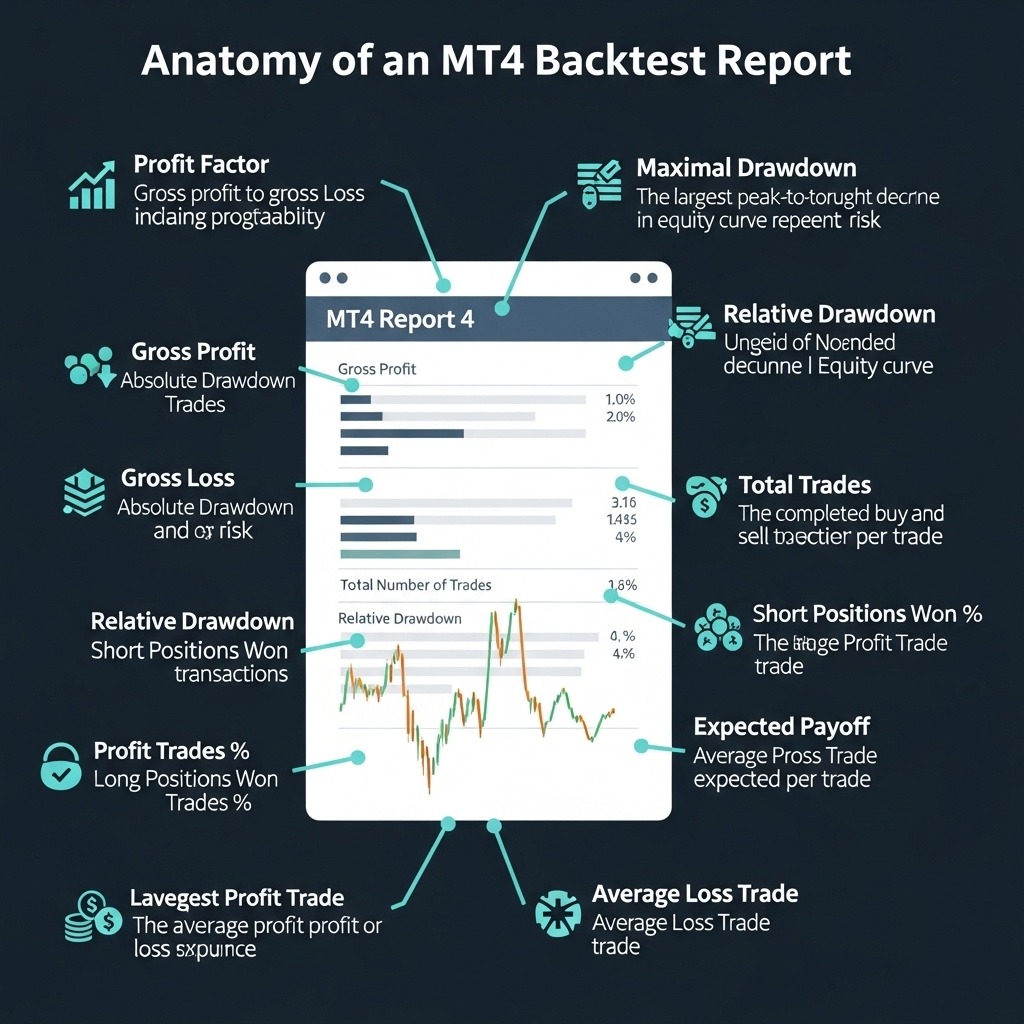
The Headline Metrics: Profit Factor & Expected PayoffIs this EA profitable, and what can I expect per trade? These two metrics give you a quick, high-level view of the strategy’s profitability. They answer the most basic question: did the strategy make more than it lost?
- Profit Factor: This is calculated by dividing the Gross Profit by the Gross Loss. It’s a measure of how many dollars were won for every dollar lost. A value below 1.0 means the strategy is losing money.
- Benchmark: A Profit Factor above 1.5 is considered decent. A value above 2.0 is very good, indicating robust profitability.
- Expected Payoff: This metric tells you the average profit or loss you can expect from each trade. It helps you determine if the reward per trade is large enough to justify the risk and to easily cover trading costs like commissions and slippage. A low expected payoff (e.g., a few cents) can be a red flag.
The Risk Metrics: Maximal & Relative Drawdown
How much money could I lose, and what is the risk to my account? Professional traders often say that risk management is more important than profit generation. These drawdown metrics are your most important indicators of risk.
- Maximal Drawdown: This is arguably the single most important metric in the entire report. It represents the largest peak-to-trough drop in your account’s equity during the test, shown as a currency amount and a percentage. It tells you the worst losing streak the EA experienced.
- Benchmark: A Maximal Drawdown below 20% is generally considered robust and manageable. A drawdown approaching 40% or more indicates a high-risk strategy that could easily blow an account.
- Relative Drawdown: This is similar but measures the largest drop relative to the account balance rather than the equity. The Maximal Drawdown (equity-based) is typically the more scrutinized figure as it reflects floating losses.
The Pro’s Edge: Data Quality and Common Mistakes to Avoid
Running a backtest is easy. Running a meaningful backtest is an art. The difference between an amateur’s test and a professional’s analysis often comes down to understanding data quality and avoiding common psychological and technical traps. This is the step that separates a “maybe” result from a statistically significant one.
Pro Tip: Always run your backtest with a fixed spread that is slightly higher than your broker’s average. This ‘stress test’ ensures your EA can remain profitable even when market conditions are less than ideal. If a strategy’s profitability disappears with an extra pip of spread, it was never robust enough for live trading.
What is “Modeling Quality” and Why 90% Isn’t Good Enough
Why does my backtest report say “90% modeling quality” and is that okay? In your MT4 report, you’ll see a “Modelling quality” percentage. Most of the time, using the default data from your broker will result in a score around 90% or an “n/a” message. This is because the free historical data provided by brokers is often incomplete, containing gaps and only representing M1 bar data.
This 90% quality is acceptable for quick, initial tests to see if a strategy has any merit at all. However, all final decisions about an EA should be based on tests with 99.9% modeling quality. This near-perfect score is achieved by importing high-quality, third-party tick data, which records every single price fluctuation. Without 99.9% quality, you are essentially testing on a low-resolution version of the market, and the results can be unreliable, especially for scalping EAs.
The 3 Deadly Sins of Backtesting
What are the most common and costly mistakes people make? Beyond data quality, several cognitive biases and technical errors can invalidate your test results. Being aware of them is the first step to avoiding them.
- Overfitting (Curve-Fitting): This is the most insidious trap. It involves endlessly tweaking an EA’s parameters until its backtest performance on a specific set of historical data looks perfect. The result is a strategy that has been “force-fit” to the past and has zero predictive power for the future. It will almost certainly fail in live markets.
- Ignoring Costs: A backtest that shows a small profit can quickly become a loser in the real world. Many traders forget to factor in the cumulative effect of spreads, commissions, and slippage (when your order is filled at a worse price than expected). Always use a realistic spread in your tests.
- Insufficient Data: Testing an EA over a few months of a strong trending market might produce spectacular results. However, this says nothing about how it will perform in a choppy, sideways market. Your test period must be long enough and diverse enough to cover multiple market regimes to truly test the EA’s robustness.
Next Steps: From Backtest to Live Trading
A positive backtest is not a finish line; it’s a green light to proceed to the next stage of validation. It provides a data-driven hypothesis that the strategy might be profitable. The next steps are designed to rigorously test that hypothesis before real money is on the line.
MT4 Strategy Tester vs. Paid Software
Do I need to buy special software to do this? The question often arises whether the free tool in MetaTrader is sufficient or if dedicated forex ea backtesting software is necessary. The answer depends on your level of commitment.
- MT4/MT5 Strategy Tester: This free, built-in tool is powerful and perfectly adequate for most traders, especially when starting out. You can achieve 99.9% modeling quality with a bit of work to import tick data. Its main limitation is that the process of managing and importing that data can be cumbersome.
- Paid Software (e.g., Forex Tester): Dedicated programs like Forex Tester are not essential for beginners, but they offer a more streamlined and professional environment. Their key advantages are easy integration of high-quality tick data, faster processing speeds, and more advanced analytical tools. For serious EA developers or traders testing dozens of systems, the investment can be worthwhile.
The Bridge to Live Trading: Optimization and Forward Testing
My backtest looks good. What do I do now? With a promising backtest report in hand, the validation process moves from the past to the present.
- Optimization: The “Optimization” tab in the Strategy Tester allows you to run hundreds of backtests automatically with different input parameter combinations to find the most profitable settings. However, this is a double-edged sword. This is the primary tool that leads to curve-fitting. Use it cautiously to find robust ranges for parameters, not to chase the single “perfect” setting.
- Forward Testing: This is the final, non-negotiable step. Take the best parameters from your backtest and run the EA on a demo account for at least one to three months. This forward test subjects the EA to live, unseen market conditions with real-time spread and slippage. If its performance aligns with the backtest results, you can finally gain the confidence to consider trading it live with a small position size.
Your Final Verdict: Making Confident Decisions with Backtesting
The journey of an automated trading strategy from an idea to a live account is long and requires disciplined validation at every step. The backtest is the most critical of these steps, serving as the gatekeeper that protects your capital from flawed and dangerous strategies.
By following this practitioner’s guide, you’ve moved beyond simple testing and are now equipped to analyze any EA with the critical eye of a professional. To recap the most vital takeaways:
- A meticulous forex ea backtest is your primary defense against losing EAs and your best tool for uncovering potential.
- Accuracy is paramount: always use the “Every tick” model and, for final validation, strive for 99.9% modeling quality using tick data.
- Pay more attention to the report’s risk metrics (especially Maximal Drawdown) than you do to the total profit. A profitable strategy with terrifying risk is a ticking time bomb.
Mastering the backtest is a crucial step in effectively using automated trading systems. It is a core component of the EA lifecycle, from selection to deployment, which we cover in The Ultimate Guide to Forex Expert Advisors (EAs).
